


Installing storage shelves on a plaster wall can be a practical and efficient way to maximize space in your home or workplace. As a storage shelves supplier, I've seen firsthand the benefits of well - installed shelves. In this blog, I'll guide you through the process of installing storage shelves on a plaster wall, ensuring a secure and long - lasting setup.
1. Planning and Preparation
Before you start the installation process, it's crucial to plan and prepare properly.
- Measure the Space: First, measure the area on the plaster wall where you want to install the shelves. Consider the size of the items you plan to store on the shelves. For example, if you're storing large boxes, you'll need wider and deeper shelves. If it's for small items like books or CDs, narrower shelves may suffice.
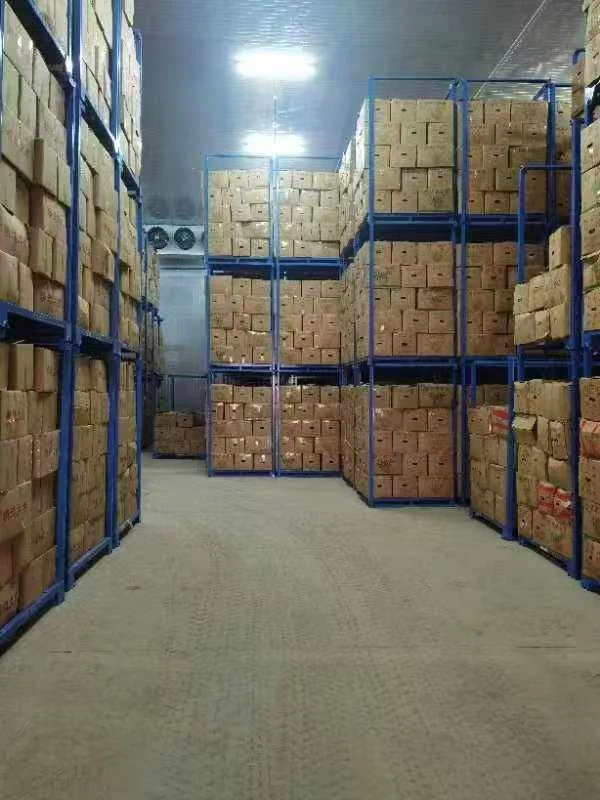
- Choose the Right Shelves: Select shelves that are suitable for your needs. We offer a variety of shelves, such as the Movable Rack for Frozen Food Storage, which is perfect for those who need to store frozen goods. The Stacking Rack for Cold Room Storage is ideal for cold rooms, providing efficient space utilization. And the Warehouse Shelve Rack is great for large - scale storage in warehouses.
- Gather Tools and Materials: You'll need a few essential tools for the installation, including a drill, screws, wall anchors, a level, a tape measure, and a pencil. Make sure you have the right type of wall anchors for plaster walls. Plastic or toggle bolts are often good choices as they can provide a secure hold in the relatively soft plaster.
2. Locating Wall Studs
Finding the wall studs is an important step as attaching the shelves to the studs will provide the most secure support.
- Use a Stud Finder: A stud finder is a handy tool that can detect the presence of studs behind the plaster wall. Run the stud finder along the wall, and it will indicate when it detects a stud. Mark the location of the studs with a pencil.
- Alternative Methods: If you don't have a stud finder, you can also look for clues like electrical outlets or light switches, as they are usually installed near studs. You can also tap on the wall; a solid, dull sound indicates a stud, while a hollow sound means there's no stud.
3. Marking the Shelf Position
Once you've located the studs, it's time to mark the position of the shelves on the wall.
- Determine the Height: Decide how high you want the shelves to be. Consider the items you'll be storing and your own convenience when accessing them. Use a level to draw a horizontal line on the wall at the desired height.
- Mark the Bracket Holes: If your shelves come with brackets, place the brackets on the wall along the horizontal line, aligning them with the studs if possible. Mark the holes for the screws on the wall using a pencil.
4. Drilling Holes and Installing Wall Anchors
Before drilling, it's important to take some precautions.
- Protect the Wall: Place a piece of masking tape over the marked holes. This helps prevent the plaster from cracking when you drill.
- Drill the Holes: Use a drill bit that is the appropriate size for the wall anchors. Drill holes into the wall at the marked locations. Make sure the holes are deep enough to accommodate the wall anchors.
- Insert Wall Anchors: Insert the wall anchors into the drilled holes. If you're using plastic anchors, tap them gently with a hammer until they are flush with the wall. For toggle bolts, follow the manufacturer's instructions carefully.
5. Attaching the Shelf Brackets
Now that the wall anchors are in place, it's time to attach the shelf brackets.

- Align the Brackets: Place the shelf brackets over the wall anchors and align the holes in the brackets with the wall anchors.
- Secure the Brackets: Insert the screws through the holes in the brackets and into the wall anchors. Use a screwdriver or a drill to tighten the screws until the brackets are firmly attached to the wall. Make sure the brackets are level using a level.
6. Installing the Shelves
After the brackets are securely attached, it's time to install the shelves.
- Place the Shelves on the Brackets: Carefully place the shelves on the brackets, ensuring they are properly seated. Some shelves may have grooves or notches that fit onto the brackets.
- Secure the Shelves (if necessary): Depending on the type of shelves, you may need to use additional screws or fasteners to secure the shelves to the brackets. Follow the manufacturer's instructions for this step.
7. Testing the Shelves
Once the shelves are installed, it's important to test their stability.
- Apply Light Pressure: Gently push and pull on the shelves to check if they are firmly attached. If there is any movement or wobbling, tighten the screws or check the wall anchors.
- Load the Shelves Gradually: Start by placing a few light items on the shelves. Observe if the shelves can support the weight without any issues. If everything seems stable, you can gradually add more items.
8. Troubleshooting
Even with careful installation, you may encounter some problems.
- Cracked Plaster: If you notice any cracks in the plaster, you can repair them using a plaster repair kit. Follow the instructions on the kit to fill the cracks and smooth the surface.
- Uneven Shelves: If the shelves are uneven, check if the brackets are level. You may need to loosen the screws, adjust the brackets, and then retighten the screws.
9. Maintenance and Care
To ensure the longevity of your storage shelves, proper maintenance is essential.
- Regular Cleaning: Dust the shelves regularly to keep them clean. Use a soft cloth or a duster to remove any dirt or debris.
- Check for Loose Screws: Periodically check the screws and brackets to make sure they are tight. Tighten any loose screws as needed.
10. Conclusion
Installing storage shelves on a plaster wall can be a rewarding project that helps you organize your space effectively. By following these steps, you can ensure a secure and stable installation. As a storage shelves supplier, we are committed to providing high - quality shelves that meet your storage needs. If you're interested in purchasing storage shelves or have any questions about the installation process, please feel free to contact us for a procurement discussion. We'll be happy to assist you in finding the perfect storage solution for your space.
References
- "Home Improvement Handbook" - A comprehensive guide on various home improvement projects, including shelf installation.
- Manufacturer's instructions for the storage shelves and wall anchors used in the installation process.


